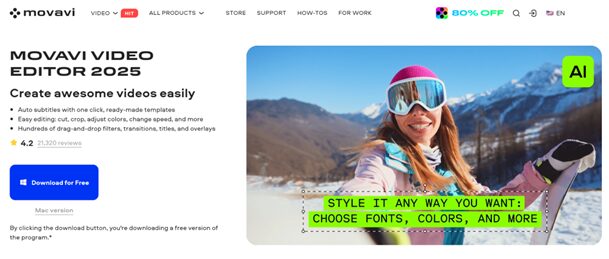
Video has become the lingua franca of the internet, yet the idea of sitting down with unfamiliar software can feel daunting if you are not a professional editor. That is why beginner‑friendly tools that still leave plenty of head‑room for growth — such as Movavi Video Editor — attract so much interest.
In this Movavi Video Editor review, we look at what the 2025 release offers, how it stacks up against other video editing software, and if it’s even worth trying out.
Movavi Video Editor Overview
Introduced as part of Movavi’s consumer‑oriented creative suite, Movavi Video Editor has evolved into a cross‑platform program for Windows and macOS that deliberately mirrors a classic non‑linear editing layout — timeline below, preview top‑right, media bin and effects top‑left — while sprinkling in modern conveniences such as AI automation and instant social‑media export presets.
The 2025 edition continues that philosophy with an upgraded timeline engine, hover‑to‑preview effects browser, and faster 4K processing. In short, it aims to bridge the gap between entry‑level simplicity and semi‑pro depth.
Basic Features (The Everyday Toolkit)
For everyday projects, Movavi supplies a tight set of tools that eliminate the usual friction points:
- Drag‑and‑drop timeline – You can drop clips, images, or audio directly onto a magnetic timeline that automatically adds new tracks when needed, so you never worry about ripple deletes or accidental desynchronization.
- Smart trimming and splitting – A single click cuts a clip (use the Split and Blade tools); trimming is easily done by dragging the edge of the footage.
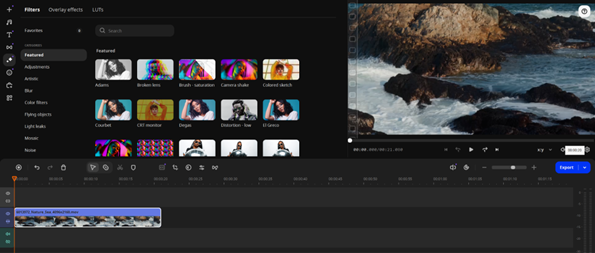
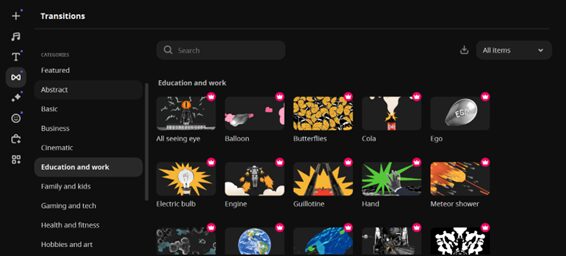
- More than 200 transitions and filters – Cross‑fades, whip‑pans, blur dissolves, and cinematic LUT‑based color filters appear in an effects browser that previews when you hover, so you see what an effect looks like before committing.
- Royalty‑free audio library – A built‑in catalogue of music, ambient beds, and sound effects saves you a separate trip to stock‑audio websites.
- One‑click aspect‑ratio presets – Switch instantly between 16:9, 9:16, 1:1, 4:5, or any custom setting — perfect for repurposing the same story across YouTube, Instagram Reels, and TikTok.
None of these tools are revolutionary on paper; what matters is their low‑friction implementation. Someone opening Movavi Video Editor for the first time can import footage, drop a theme music bed, add a title, and export a finished 1080p MP4 in about the same time it takes to watch the coffee machine finish brewing.
Advanced Features
Movavi’s newer releases lean heavily on machine‑learning trickery that once required costly plug‑ins:
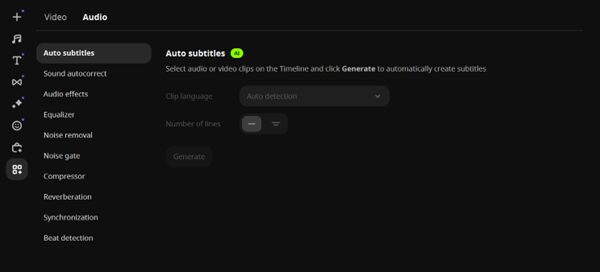
- AI Auto‑Subtitles – The program transcribes speech on‑device and adds captions into the video. The most common languages, from English to Chinese, are covered, and styles are fully customizable.
- AI Background Removal – Forget the green‑screen: isolate subjects with two clicks, then drop in a branded backdrop or animated gradient.
- Motion Tracking – Select an object and pin text, emojis, or another clip so it follows automatically — great for product call‑outs or censorship stickers.
- AI Audio Noise Removal – Windscreen rumble or hums can be softened without the detour to an external audio editor.
- Picture-in-Picture – Overlay one video or image onto another one so that both are visible on the screen.
- Chroma Key (or green screen) – If you’re a fan of traditional methods of background removal, use this effect.
- Video Stabilization – Analyze footage and smooth out shaky clips automatically.
Movavi Video Editor: Pros and Cons
No software is perfect, and each has its strengths and weaknesses. Let’s discuss the ones of Movavi Video Editor.
Pros
- Intuitive learning curve thanks to an uncluttered interface and gentle learning gradient.
- AI time‑savers like auto‑subtitles and noise removal strip hours from routine edits.
- Cross‑platform parity — Mac and Windows versions share the same UI and project format.
- Affordable one‑time license with no mandatory subscription; upgrades are optional and discounted.
- Surprisingly fast render engine.
Cons
- The free version applies a watermark, restricts export length, and locks some effects, so it is unsuitable for commercial work.
- Lacks some pro‑grade controls: no advanced color wheels, limited audio bus routing, and multicam caps at four tracks.
- Paid effect packs in the built‑in Store can inflate the overall cost if you are tempted by every transition set.
- Heavy AI tasks on older dual‑core systems may cause stalls.
Pricing
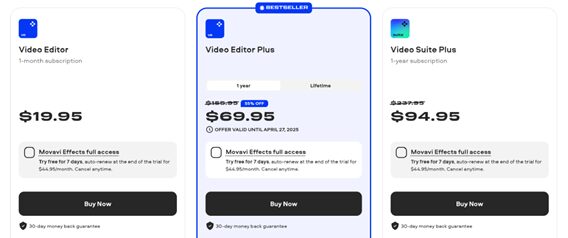
- One‑Month Subscription – US $19.95. Includes free updates throughout your subscription period.
- Lifetime Personal License (Video Editor Plus) – US $94.95. Includes free updates within the current app version + 3 effect packs for a quick start.
- One‑Year Subscription (Video Editor Plus) – US $69.95. Includes free updates throughout your subscription period + 3 effect packs.
- Video Suite Bundle – US $94.95 per year combines the video editor, a video converter, a screen recorder, and 3 effect packs.
How to Make a Video in Movavi Video Editor: A Quick Guide
Let’s also take a look at the video creation process inside Movavi Video Editor to help you understand the software better.
- Download and install the free trial or activate your license, then launch the program.
- Create a new project by choosing an aspect ratio or let Movavi match the first clip’s resolution.
- Import media by dragging footage, photos, music, or recordings onto the timeline. The program silently builds proxy files to keep playback fast.
- Rough‑cut your story: Hit the Split or the Blade tool to make cuts, and delete unwanted sections.
- Fine‑tune using the Stabilization option to calm shaky handheld shots, and the Effects and filters tab to apply a LUT or tweak exposure, temperature, and contrast.
- Add titles, effects, and transitions: hover over an effect to preview; then drag your chosen transition or title style onto the timeline. Use simple dissolves between similar shots and save flashy transitions for scene breaks.
- Insert audio and captions: drag a music track to the audio lane and pull the fade‑handles to duck beneath speech. For captions, open Titles → Auto Subtitles, pick your language, and hit Generate.
- Export by clicking the Export button, selecting a preset, adjusting bitrate if you need a smaller file, and pressing Start.
For a simple talking‑head vlog, total editing time from first import to final upload can be under fifteen minutes — a testament to Movavi Video Editor’s streamlined workflow.
Final Thoughts
Movavi Video Editor occupies a sweet spot: it strips away the intimidating complexity of heavyweight professional suites while adding enough AI‑driven muscle to remain relevant for years.
If you already feel at home inside more leading-edge software and rely on advanced color science, 3D compositing, or multi‑user workflows, Movavi Video Editor will feel restrictive.
But for students, educators, marketers, and side‑hustle YouTubers who want to edit videos fast without reading a 300‑page manual, the program hits the mark. Download the trial, drop a clip on the timeline, and see how quickly “I’ll learn to edit someday” turns into “Video uploaded.”